Manipulated Image
Albina Mirena
Henry Moss Middle School, 7th grade
Faded Face ~ Manipulated Image Submission
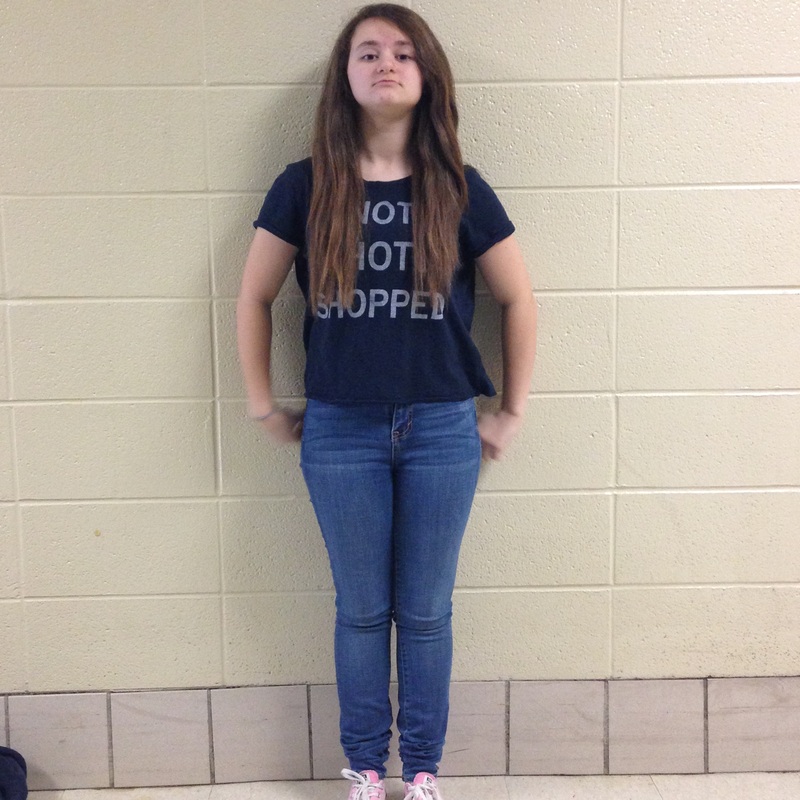
Before I started the editing/manipulating process I had to have a photo, so my friend helped take the photo of me in our school hallway. After this, I imported the photo into an app called Line Brush, an iOS/mobile app. On this app, there were many brushes to select, but the perfect one was the ‘airbrush’ brush. Once I’ve done this, I tapped the button to change the color, and in the top left corner is the color dropper.
I needed to find the right color that matched my skin tone, so I tapped that icon and dropped it over the right side of my face. This gave me the exact skin tone that I needed to cover up my face. I then exited out of that tab and at the bottom, noticed the size of the brush was too large to fit the selected area (face), and the opacity was at ‘100%’, which was too much for what I actually needed. So I minimized the size down to about a ‘54’, and the opacity to a ‘60%’.
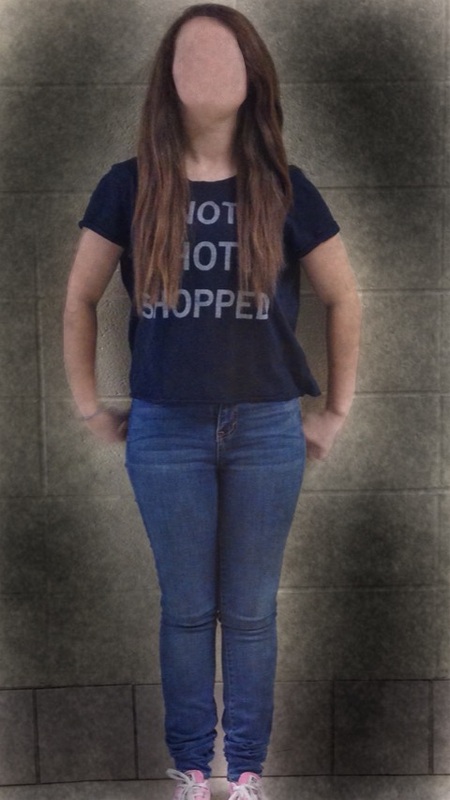
Following that, I tested the brush and it ended up being just fine. I start to swipe the brush over the selected area, taking about five or six layers of it to cover the face at the perfect amount. After that, it started to look a little realistic. But I chose to make it look actually real, so I changed the color to a less-contrasted blue and downsized the brush size, along with the opacity.
Since the color was changed, I added that blue onto the top left corner of the face and changed the color again. This time, a less-contrasted red color. Next, I added the red to the left bottom corner and right side of the middle area. This change to the photo made the face look hurt.
One more thing to add to the image was the dark background. I changed the color of the brush to a jet black color before applying it. Then I change the size and opacity once again, size: about ‘70’. Opacity: near ‘85%’. Adding the background in, I make sure it covered a light portion of my arms.
Lastly, I faded the saturation of the whole photo to give it a more mysterious look. After looking over it, it turned out to be what I expected and/or pictured in mind.
Henry Moss Middle School, 7th grade
Faded Face ~ Manipulated Image Submission
Before I started the editing/manipulating process I had to have a photo, so my friend helped take the photo of me in our school hallway. After this, I imported the photo into an app called Line Brush, an iOS/mobile app. On this app, there were many brushes to select, but the perfect one was the ‘airbrush’ brush. Once I’ve done this, I tapped the button to change the color, and in the top left corner is the color dropper.
I needed to find the right color that matched my skin tone, so I tapped that icon and dropped it over the right side of my face. This gave me the exact skin tone that I needed to cover up my face. I then exited out of that tab and at the bottom, noticed the size of the brush was too large to fit the selected area (face), and the opacity was at ‘100%’, which was too much for what I actually needed. So I minimized the size down to about a ‘54’, and the opacity to a ‘60%’.
Following that, I tested the brush and it ended up being just fine. I start to swipe the brush over the selected area, taking about five or six layers of it to cover the face at the perfect amount. After that, it started to look a little realistic. But I chose to make it look actually real, so I changed the color to a less-contrasted blue and downsized the brush size, along with the opacity.
Since the color was changed, I added that blue onto the top left corner of the face and changed the color again. This time, a less-contrasted red color. Next, I added the red to the left bottom corner and right side of the middle area. This change to the photo made the face look hurt.
One more thing to add to the image was the dark background. I changed the color of the brush to a jet black color before applying it. Then I change the size and opacity once again, size: about ‘70’. Opacity: near ‘85%’. Adding the background in, I make sure it covered a light portion of my arms.
Lastly, I faded the saturation of the whole photo to give it a more mysterious look. After looking over it, it turned out to be what I expected and/or pictured in mind.
|
|
Camden Allen
Henry Moss Middle School, 8th grade
At the Drive In ~ Manipulated Image
When I was told about this project I already knew I was going to do manipulated image. I have recently been successful in competing with this category in the Junior Beta Club. My projects I did for Beta had won at school level to go compete at state convention for 2 years in a row. I have a lot of experience in using programs for editing photos and a lot of experience in photography.
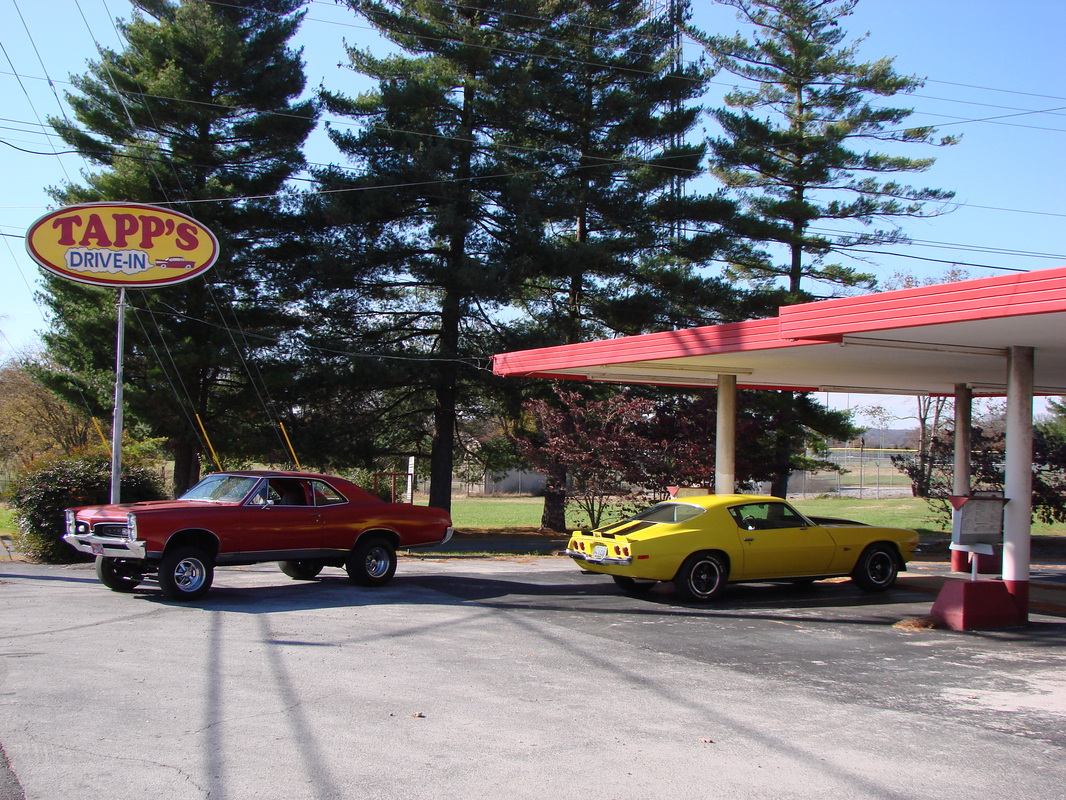
The first thing I did when I was told about this project was find a location to take a picture at. I was thinking a historic place because I was doing black and white photo. The location I chose was Tapp’s drive in, a historical drive in that shut down not too long ago in Bowling Green, Kentucky. I thought this place was perfect for a black and white photo.
After I chose my location I was thinking that the picture would be kind of dull if it was just a picture of an old shut down place. I thought about picking a different location but then my mom suggested that I ask one of my uncles, who owns a bunch of old cars, to bring some of their cars to the drive in and park them in front of the building to add in the picture. So I got 1 of my uncles to bring a red Pontiac GTO and another uncle to bring a yellow and black Chevrolet ‘69 Camaro.
So, we went to the drive in and I took several pictures of the cars parked in different spots. I took several because I needed more photos to choose from just in case something got in the photo that couldn’t be edited out. Once I got all of my pictures I headed back home to work on picking a photo and editing it. On our way home we rode in the Camaro and ended up getting a flat tire!
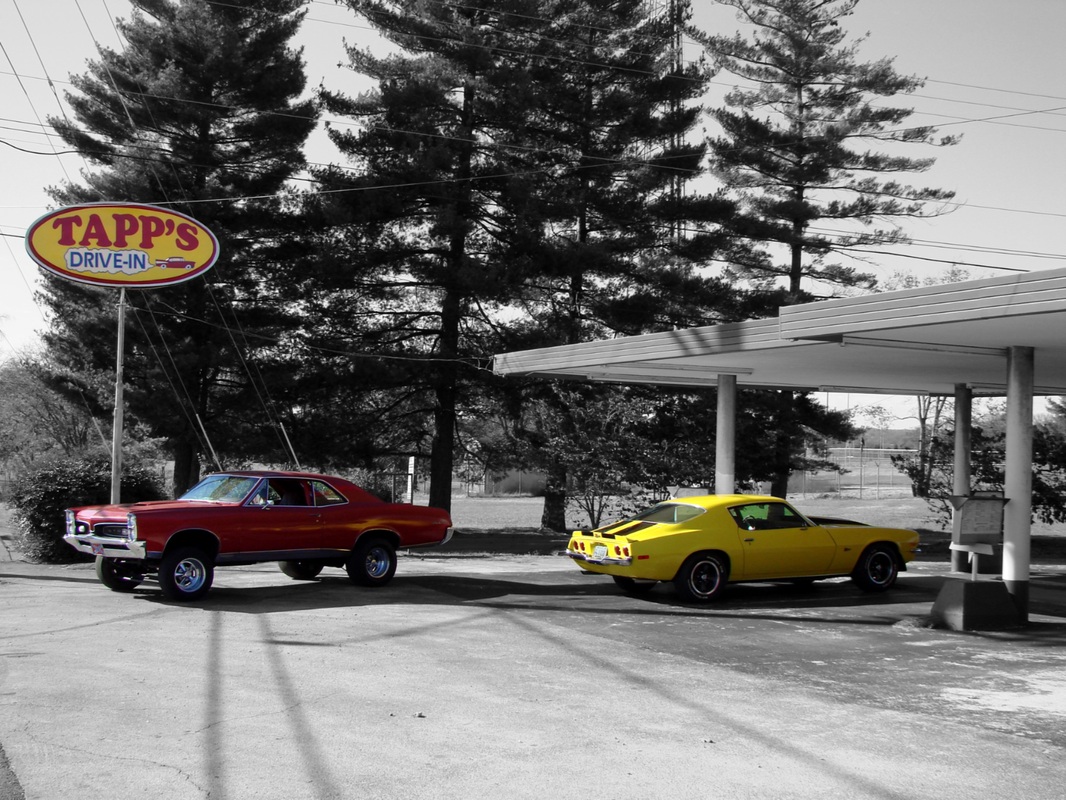
When I got home I uploaded the picture to our Windows computer and I edited the photo on a program called Photo Explosion Deluxe. On that program I turned the picture black and white. My mom had noticed the option to add color to objects that were black and white so I added color to the two cars and the Tapp’s drive in sign. After that I thought my picture looked amazing.
When I finished editing my picture we went to Walmart to print both the original and edited. After we printed them we framed them just in case we needed a printed copy. When we got home from printing it we emailed both photos to my technology/STLP teacher and he submitted it into the winter virtual showcase to get judged.
Henry Moss Middle School, 8th grade
At the Drive In ~ Manipulated Image
When I was told about this project I already knew I was going to do manipulated image. I have recently been successful in competing with this category in the Junior Beta Club. My projects I did for Beta had won at school level to go compete at state convention for 2 years in a row. I have a lot of experience in using programs for editing photos and a lot of experience in photography.
The first thing I did when I was told about this project was find a location to take a picture at. I was thinking a historic place because I was doing black and white photo. The location I chose was Tapp’s drive in, a historical drive in that shut down not too long ago in Bowling Green, Kentucky. I thought this place was perfect for a black and white photo.
After I chose my location I was thinking that the picture would be kind of dull if it was just a picture of an old shut down place. I thought about picking a different location but then my mom suggested that I ask one of my uncles, who owns a bunch of old cars, to bring some of their cars to the drive in and park them in front of the building to add in the picture. So I got 1 of my uncles to bring a red Pontiac GTO and another uncle to bring a yellow and black Chevrolet ‘69 Camaro.
So, we went to the drive in and I took several pictures of the cars parked in different spots. I took several because I needed more photos to choose from just in case something got in the photo that couldn’t be edited out. Once I got all of my pictures I headed back home to work on picking a photo and editing it. On our way home we rode in the Camaro and ended up getting a flat tire!
When I got home I uploaded the picture to our Windows computer and I edited the photo on a program called Photo Explosion Deluxe. On that program I turned the picture black and white. My mom had noticed the option to add color to objects that were black and white so I added color to the two cars and the Tapp’s drive in sign. After that I thought my picture looked amazing.
When I finished editing my picture we went to Walmart to print both the original and edited. After we printed them we framed them just in case we needed a printed copy. When we got home from printing it we emailed both photos to my technology/STLP teacher and he submitted it into the winter virtual showcase to get judged.
|
|
