Manipulated Image Products
Albina Mirena
Henry Moss Middle School, 8th Grade
Manipulated Image
Framed
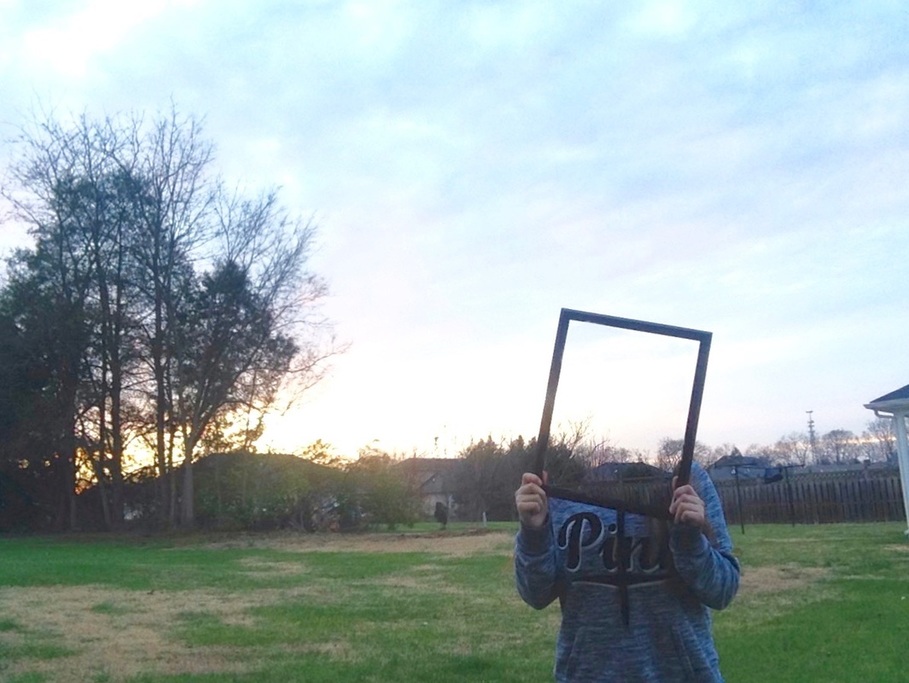
When I was first told about this project, I immediately wanted to do the manipulated image. At first, I didn’t know what Idea to go for, but I finally found some inspiration dealing with a photo frame on the social media app, Tumblr.
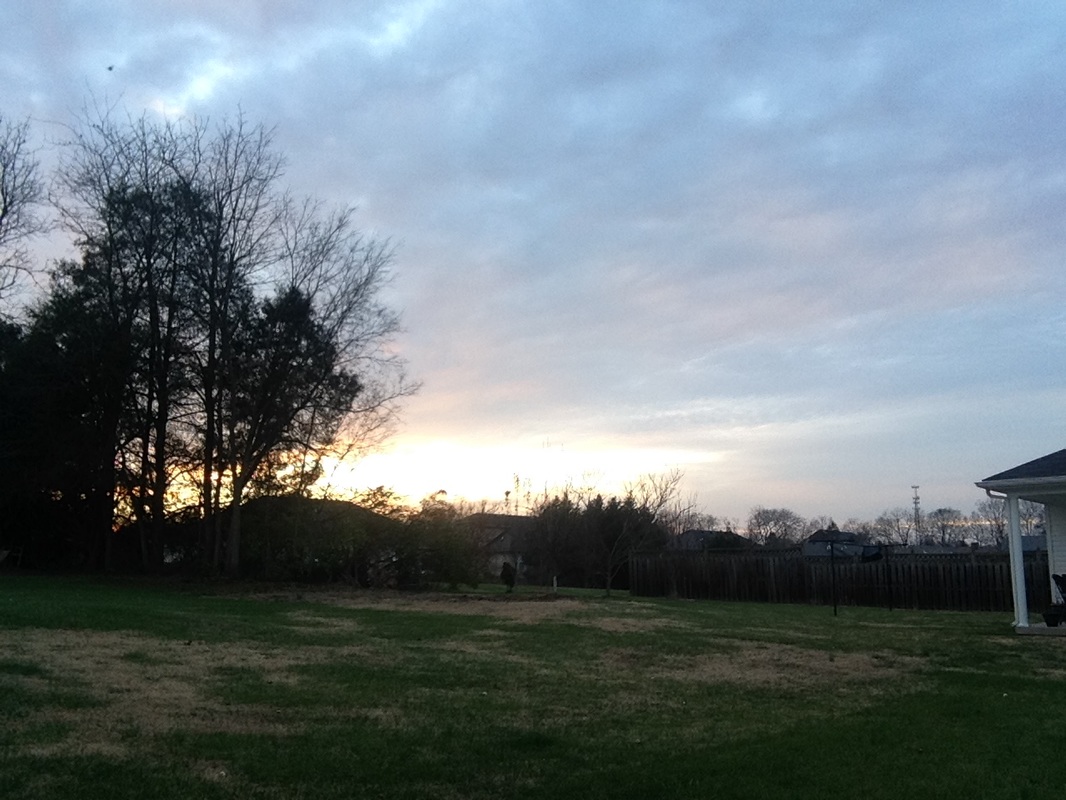
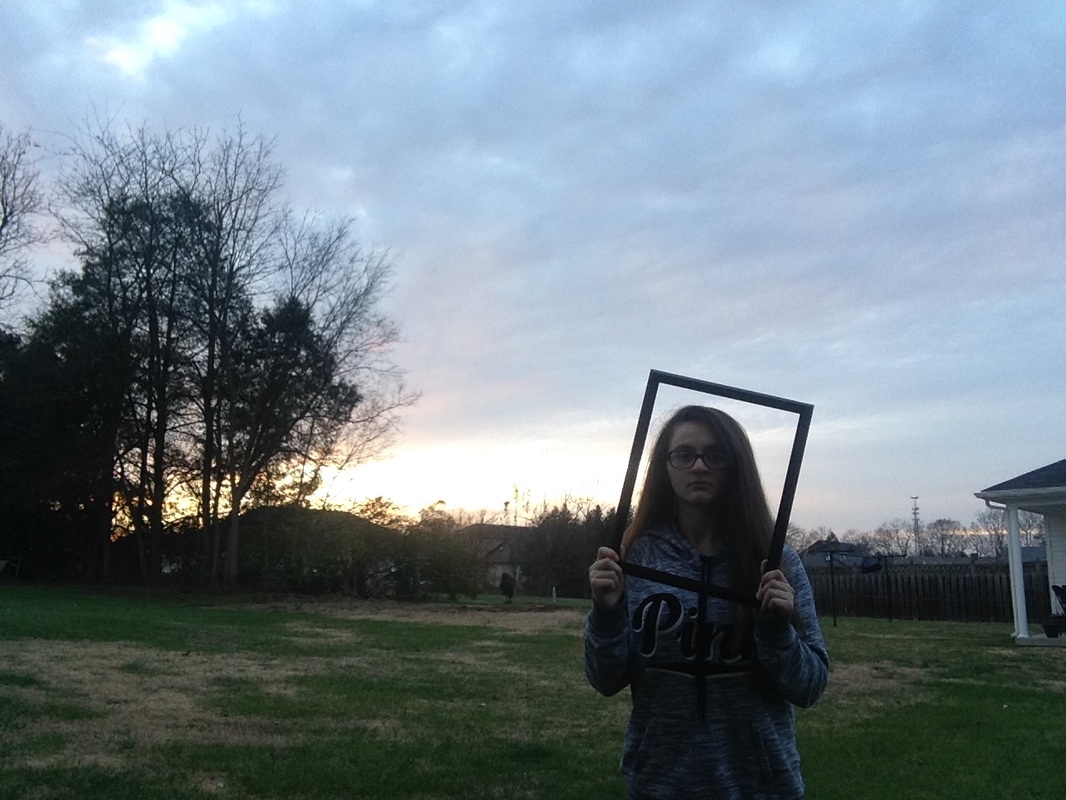
In order to take these photos, I needed a frame and some sort of scenery, So I grabbed a picture frame & my phone and went out to my backyard. After this, I propped my phone up on a table and set the camera on a timer. During the process of taking photos it was sort of difficult to get two perfect photos, considering the sky was getting darker, and in the many photos I had taken, the lighting was dissimilar. But after around ten photos, I managed to get two pictures that turned out the best out of all.
For the manipulating portion, I used a mobile app called “Picsart.” This app has a photo overlaying section, so I started with that. Taking the first photo with myself in it, I import it and the picture of only the scenery and started “erasing” the area inside the frame, which included my head. Since I wasn’t fond of how it turned out, I undid the actions and went back to alter the brush settings of its softness, opacity, and size many times, testing it too, before starting to actually “erase."
When I finally starting the erasing, I had to be careful not to erase the picture frame, any of my torso, or my thumbs ( which were inside the frame). Finally, being done with that part of the editing, I slightly altered the brightness of the final product so that the image didn’t look so dim, lighting wise.
Henry Moss Middle School, 8th Grade
Manipulated Image
Framed
When I was first told about this project, I immediately wanted to do the manipulated image. At first, I didn’t know what Idea to go for, but I finally found some inspiration dealing with a photo frame on the social media app, Tumblr.
In order to take these photos, I needed a frame and some sort of scenery, So I grabbed a picture frame & my phone and went out to my backyard. After this, I propped my phone up on a table and set the camera on a timer. During the process of taking photos it was sort of difficult to get two perfect photos, considering the sky was getting darker, and in the many photos I had taken, the lighting was dissimilar. But after around ten photos, I managed to get two pictures that turned out the best out of all.
For the manipulating portion, I used a mobile app called “Picsart.” This app has a photo overlaying section, so I started with that. Taking the first photo with myself in it, I import it and the picture of only the scenery and started “erasing” the area inside the frame, which included my head. Since I wasn’t fond of how it turned out, I undid the actions and went back to alter the brush settings of its softness, opacity, and size many times, testing it too, before starting to actually “erase."
When I finally starting the erasing, I had to be careful not to erase the picture frame, any of my torso, or my thumbs ( which were inside the frame). Finally, being done with that part of the editing, I slightly altered the brightness of the final product so that the image didn’t look so dim, lighting wise.
Original Images
|
|
Manipulated Image
Jahfi Jones, 8th grade
Henry Moss Middle School
Manipulated Image
The Oldschool Effect
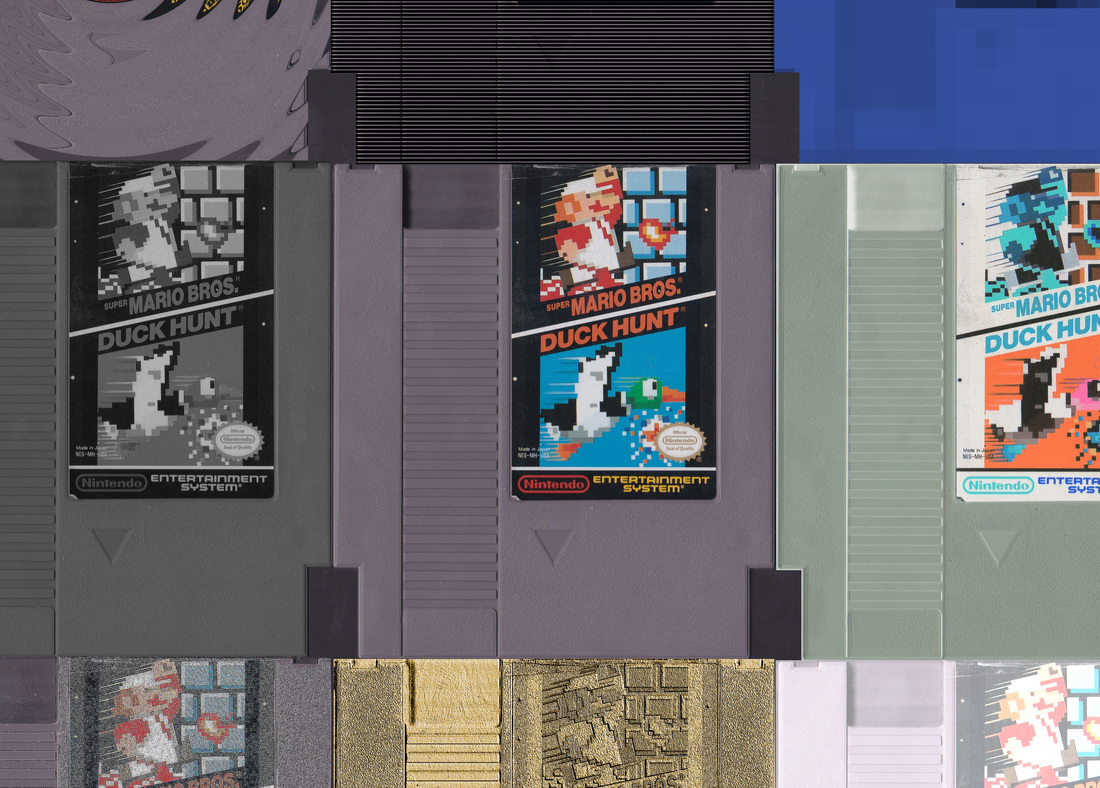
This is my Manipulated Image project for STLP. I created this image using GIMP on an iMac.
I took the original photo of the Super Mario Bros./Duck Hunt cartridge by running it through my printer’s scanner. I then uploaded the image into GIMP. Once it was in GIMP, I used the cutting tool to cut out only the cartridge from the scanned image. I then pasted eight more of the original scanned image; each using a different effect.
The original cartridge (center) has no effects applied to it. The first cartridge I pasted (right) used the “invert” effect: changing all of the colors of the cartridge to their opposite counterparts. The second cartridge (left) is black and white; done by using the “colorize” tool, and turning the hue and saturation all the way down.
The third cartridge (bottom) uses the “emboss” filter; making the cartridge look gold and rough. The fourth cartridge (top) uses the “erase every other row” effect; making dark lines appear on it. The fifth cartridge (top right) uses two effects; the “pixelate” effect, making the image very blurry, and the “colorize” effect, making it blue.
The sixth cartridge (top left) uses the “wave and pinch” effect, making it look distorted. The seventh cartridge (bottom left) uses the “noise generator” effect, making the cartridge appear grainy. The last cartridge (bottom right) uses a simple “brightness” effect; using the “brightness/contrast” tool and turning the brightness up a bit.
With these effects, the picture is now complete! Overall, it took about three days to complete. The most difficult part was what effect to use for each cartridge. Thank you for reading my documentation on my STLP Manipulated Image project.
Henry Moss Middle School
Manipulated Image
The Oldschool Effect
This is my Manipulated Image project for STLP. I created this image using GIMP on an iMac.
I took the original photo of the Super Mario Bros./Duck Hunt cartridge by running it through my printer’s scanner. I then uploaded the image into GIMP. Once it was in GIMP, I used the cutting tool to cut out only the cartridge from the scanned image. I then pasted eight more of the original scanned image; each using a different effect.
The original cartridge (center) has no effects applied to it. The first cartridge I pasted (right) used the “invert” effect: changing all of the colors of the cartridge to their opposite counterparts. The second cartridge (left) is black and white; done by using the “colorize” tool, and turning the hue and saturation all the way down.
The third cartridge (bottom) uses the “emboss” filter; making the cartridge look gold and rough. The fourth cartridge (top) uses the “erase every other row” effect; making dark lines appear on it. The fifth cartridge (top right) uses two effects; the “pixelate” effect, making the image very blurry, and the “colorize” effect, making it blue.
The sixth cartridge (top left) uses the “wave and pinch” effect, making it look distorted. The seventh cartridge (bottom left) uses the “noise generator” effect, making the cartridge appear grainy. The last cartridge (bottom right) uses a simple “brightness” effect; using the “brightness/contrast” tool and turning the brightness up a bit.
With these effects, the picture is now complete! Overall, it took about three days to complete. The most difficult part was what effect to use for each cartridge. Thank you for reading my documentation on my STLP Manipulated Image project.
|
Original Image

|
Manipulated Image
|
